 Best Floor Jack Guide
 When you have such a powerful device like the floor jack and not knowing how to use it can be quite frustrating. You must have heard so many people talk about how easy it is to use the floor jack and the type of convenience that it offers. If you are a car owner, you may want to have a floor jack in your garage.
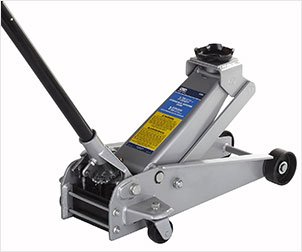
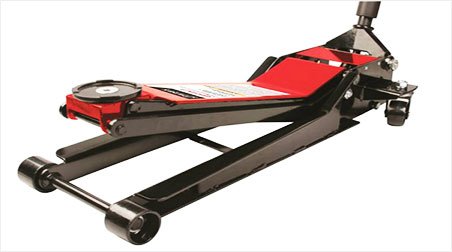
A floor jack is a mechanical device, which will allow you to lift vehicles without much difficulty. Ordinarily, vehicles are quite heavy, and lifting them may require a whole lot of effort. Fortunately, the floor jack will make the whole process much easier, but this will be dependent on the ability to be able to use the floor jack in the right manner.
When using the floor jack, there is a very high-risk level involved if you do not know how to use it in the right manner. You can imagine if the whole weight of the vehicle was to drop on you while working under the vehicle. This can cause serious injuries and possibly cause death. As such, one of the key concerns that you should take seriously when using a floor jack is your personal safety.
The proper use of the floor jack will also prevent damage from occurring on the vehicle. There are quite supporting accessories that you should use with the floor jack. In this guide, you will learn how to use the floor jack properly. This will alleviate any cases of injuries or damages to the vehicle.
[wpsm_divider top=”15px” bottom=”15px” style=”solid”]
How should you use a floor jack effectively?
[wpsm_divider top=”15px” bottom=”15px” style=”solid”]Setting up the Floor Jack for Use:
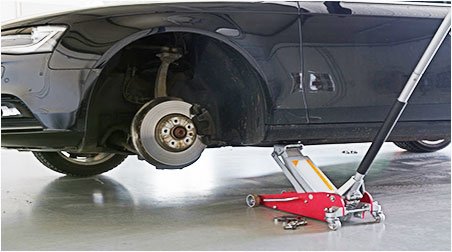
If you need to use the floor jack to lift your vehicle, there are a number of things that you should do as preparation. You should ensure that all the tools that you need to use for the task at hand are at your disposal. Have the vehicle placed at a leveled surface and also ensure that the floor jack has the capacity to lift the vehicle.
If you have a lowered car, you may need to find a low-profile floor jack, which will be able to slip under the car, without any problems. As for the high vehicles, the bottle jack may come in handy since it has a higher minimum height, making it easier to reach the jack points on such vehicles.
For your own safety, inspecting the floor jack before using it would be highly recommended. Check if all the parts are intact and also test the jack, without any load on it. This will help you notice if there is a defect with the normal functionality of the floor jack.
Get all the safety accessories as well like coveralls, gloves, safety goggles, and steel-toed shoes. This is in a bid to enhance your safety in the garage. Check all the accessories like jack stands, wheel chocks, creepers, and so on, and ensure that they are functional. All these things should be part of the preparation and should be done prior to the actual use of the floor jack.
[wpsm_divider top=”15px” bottom=”15px” style=”solid”]
Jacking Up the Vehicle:
As soon as you are done with the setup and preparation of the floor jack, you can make arrangements to lift your vehicle using your floor jack. Here are the practical steps, which you should follow. We have put together these steps, after thorough research and testing so to ensure maximum safety and proper use of the floor jack.
Step 1: Have the Car Parked on a Solid Surface
Before attempting to jack up your car, you should ensure that it is parked on a flat surface, which is solid. A concrete driveway should serve the purpose. The condition of the surface should be solid such that the floor jack or the jack stands will not start to sink in when jacking up the vehicle.
You should try to use the floor jack on a soft surface like sand or grass as this may cause serious damage and injuries.
Step 2: Engage the Parking Brake
Once you have parked the vehicle, engage the parking brake or the hand brake to make the vehicle totally static. This will prevent any cases of the vehicle moving when being jacked up.
Step 3: Put the Wheel Chock in Position
Wheel chocks are some of the most reliable floor jack accessories that you should use. When you have established which end of the vehicle you intend to work in, you should place the wheel chocks on the opposite side. Have the wheel chocks on both sides of any tire that you do not intend to jack up.
The main objective of the wheel chocks is to ensure that the vehicle does not start rolling when you start jacking it up. If you are working on the back end of the vehicle, you cannot afford to leave out the wheel chocks. The back wheels are the ones that have the parking brake and when you lift the back end, the front wheel may start to roll.
Step 4: Test-run the Floor, Jack
Before starting to jack up the car, you should test the floor jack, using your hands. This allows you to check if it is engaging and disengaging as required. The objective is to ensure that it is rising, holding, and releasing normally. This is not something that you can test with a load. Take time to also check the jack stands if they are in perfect shape to handle the load.
Step 5: Place the Jack on Jack Points
The success of using your floor jack properly lies in being able to identify the jack point. Every car manufacturer will indicate the right jack point on the vehicle. The jack points are on the underside of the vehicle’s frame and are designed in such a manner that they can hold the weight of the vehicle once it is jacked up.
If you are not sure where the jack points, are, you should consult the owner’s manual of your vehicle. This will provide all the relevant information and allows you to find the jack points to place your floor jack on.
Step 6: Jack up the Vehicle Using the Floor Jack
The next step is lifting the vehicle using the floor jack. This is after having established the right jack points and placed the floor jack in position. You should be able to lift the vehicle high enough to be able to access the parts that are underneath for purposes of carrying out your repairs and maintenance.
It is important to note that you should ensure that the jack is stable and the vehicle is on a sold surface, which is flat. The saddle of the jack should have accurate contact with the jack point before the lifting can begin. Ensure that the release valve is closed and then start lifting the vehicle in slow motion. This allows you to adjust the saddle up to the point where it supports the vehicle at the right angle.
Step 7: Place Jack Stands
As mentioned earlier, there are certain accessories that you should have at your disposal, and jack stands are among them. Once the vehicle is hoisted to the right position, you should place the jack stands underneath the vehicle. Adjust the height of the floor jack such that it will fit under the vehicle, without a problem.
Again, when placing the jack stands, you should strategically place them on the jack points that are outlined. The jack stands should fit properly underneath the specified jack points and should rest on a solid surface.
Test the stability of the jack stands using your hands so as to ensure that they are firm enough. If they are stable, you should start lowering the floor jack gradually, so as to make sure that the vehicle rests on the jack stands. You should only go underneath a vehicle when you have verified that the jack stands are secure and hold the vehicle in a stable manner.
[wpsm_divider top=”15px” bottom=”15px” style=”solid”]
Caution:
Do not be deceived by any manufacturer into not using a floor jack. Even the best floor jacks in the market are just mechanical devices, which are liable to fail at one point or another. It would be a serious disaster if the floor jack can fail and drastically drop to the resting position. This will not only damage the vehicle, but also cause serious injuries to the person working underneath the vehicle. Due to impact, the injuries may turn out to be fatal.
Always ensure that the jack stands that you have, will be able to hold up the weight of the vehicle. You should only use matching jacks that come as a pair as this is the only way that you can be certain that the vehicle will be stable.
[wpsm_divider top=”15px” bottom=”15px” style=”solid”]
Step 8: Take Away the Floor Jack
When you have put the jack in the place and they are secure enough. You should remove the floor jack and place it aside. Before going underneath the vehicle, you should shake the vehicle lightly so as to ensure that it is stable. If you notice any part that tends to be unstable, you should adjust it accordingly.
Even with the jack stands in place, you can consider having elevated wooden blocks placed underneath the car. This will serve as extra precautionary measures, in the event the jack stands cave in. You should only use items that are made of solid material, which can be able to withstand the weight of the vehicle in case it slips and falls. Cinder blocks and bricks would be a perfect choice and you can have them placed need the jack points of the vehicle.
[wpsm_divider top=”15px” bottom=”15px” style=”solid”]
Importance of the Work Surface:
The proper use of the floor jack will heavily depend on the surface that you are working on. Remember that part of the preparation that we discussed earlier is ensuring that the vehicle is parked on a solid surface, which is flat. You should never take the risk of trying to use the floor jack on soft surfaces like sand, dirt, or grass.
With a solid surface, the jack and the jack stands are able to hold and support the weight of the vehicle, without sinking in. Ideally, the proper use of a floor jack is using it in a safe manner. Safety does not only apply to the vehicle but also to your personal safety. If you are not sure about how to go about using your floor jack, you should consult an expert. There is a very high risk of suffering injuries and even damaging your vehicle when you use the floor jack in a worn manner.
[wpsm_divider top=”15px” bottom=”15px” style=”solid”]
[wpsm_divider top=”15px” bottom=”15px” style=”solid”]Final Thoughts:
The hydraulic floor jack and jack stands will allow you to be able to carry out a wide array of routine maintenance tasks. However, this will only happen if you are able to use the floor jack effectively. The internet is flooded with a whole lot of information about the use of a floor jack. It is important to note that some of the sources are not reliable and may mislead you.
You should only rely on expert advice like the one that we have given you above. This is the only way that you can be able to use the floor jack, without any difficulties. With the information that we have provided through this guide, we do hope that you can be able to use the floor jack effectively. There is a wide array of benefits that you will stand to gain, by doing this the right way.
Your level of confidence will rise once you have established how to use the floor jack properly. This will eventually save you the time and the cost that you spend by going to an auto shop for minor repairs. You will be able to perform routine checks and maintenance on your vehicle.